


HX1230 Graphic LCD Wiring Guide
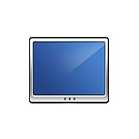
The HX1230 LCD is a basic graphic LCD screen originally intended for as a cell phone screen. It uses the HX1230 controller to drive a graphic display of 68 rows and 96 columns.
In the guide below we will walk you through the steps to install u8g2 library to Arduino IDE and to interface this LCD to Arduino Uno, ESP32 and STM32F103C8T6 Microcontrollers.
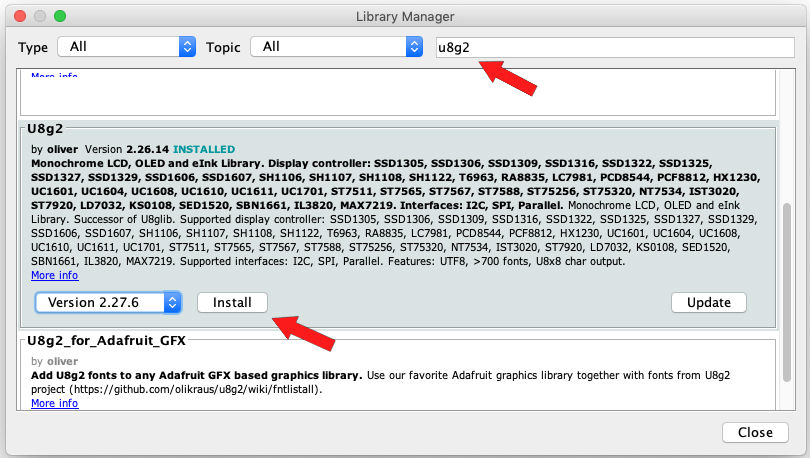
Install u8g2 library
In Arduino IDE, go to Sketch > Include Library, select Manage Libraries
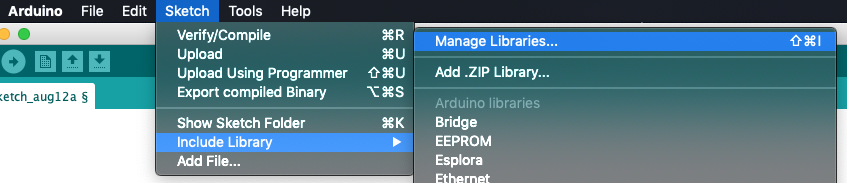
Search for u8g2, select latest version and click on Install button
Sample sketch
In Arduino IDE, go to
Files > Examples > U8g2 > full_buffer. Click on GraphicTest

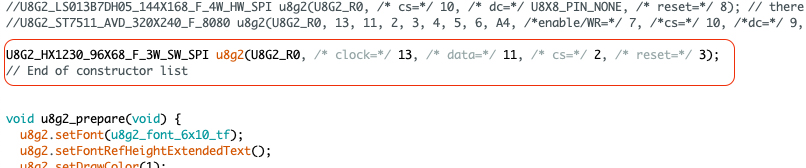
Arduino Uno
Copy and paste the Constructor below to your GraphicTest sketch (place the constructor right above "//end of constructor list"):
U8G2_HX1230_96X68_F_3W_SW_SPI u8g2(U8G2_R0, /* clock=*/ 13, /* data=*/ 11, /* cs=*/ 2, /* reset=*/ 3);
Wiring
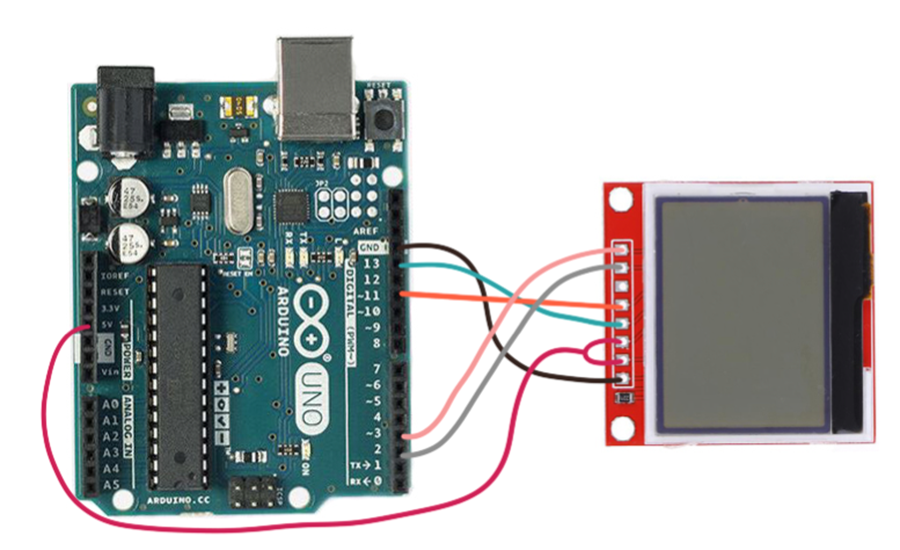
| HX1230 | Uno | U8G2 |
| GND | GND | - |
| BL (backlight) | 3.3V | - |
| VCC | 3.3V | - |
| CLK | pin 13 | clock |
| DIN | pin 11 (MOSI) | data |
| NC | *no connection* | - |
| CE | Pin 2 (CS) | cs |
| RST | Pin 3 | reset |
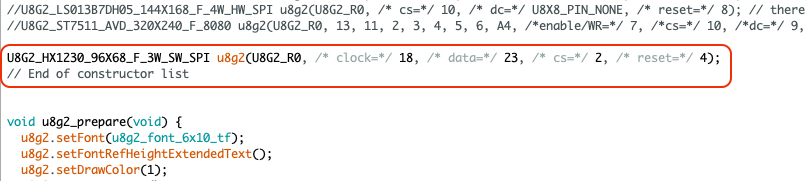
ESP32
Copy and paste the Constructor below to your GraphicTest sketch (place the constructor right above "//end of constructor list"):
U8G2_HX1230_96X68_F_3W_SW_SPI u8g2(U8G2_R0, /* clock=*/ 18, /* data=*/ 23, /* cs=*/ 2, /* reset=*/ 4);
Wiring
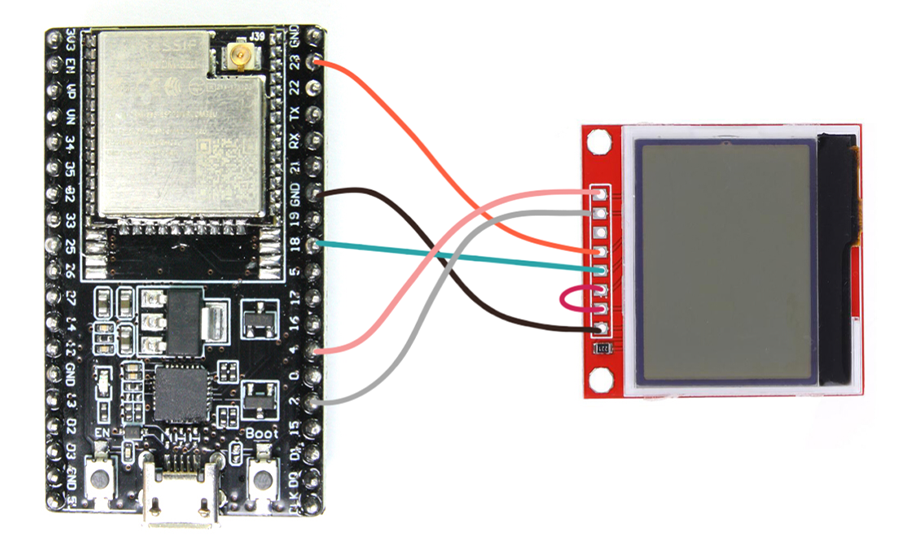
| HX1230 | ESP32 | U8G2 |
| GND | GND | - |
| BL (backlight) | 3.3V | - |
| VCC | 3.3V | - |
| CLK | Pin 18 | clock |
| DIN | Pin 23 | data |
| NC | *no connection* | - |
| CE | Pin 2 | cs |
| RST | Pin 4 | reset |
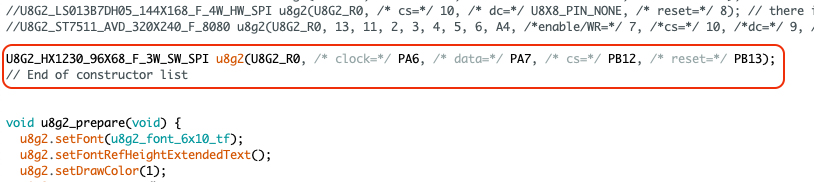
STM32F103
Copy and paste the Constructor below to your GraphicTest sketch (place the constructor right above "//end of constructor list"):
U8G2_HX1230_96X68_F_3W_SW_SPI u8g2(U8G2_R0, /* clock=*/ PA6, /* data=*/ PA7, /* cs=*/ PB12, /* reset=*/ PB13);
Wiring

| HX1230 | STM32Fxx | U8G2 |
| GND | GND | - |
| BL (backlight) | 3.3V | - |
| VCC | 3.3V | - |
| CLK | PA6 / SCK1 | clock |
| DIN | PA7 / MOSI1 | data |
| NC | *no connection* | - |
| CE | PB12 | cs |
| RST | PB13 | reset |
