


Program STM32 Blue Pill (STM32F103C8T6) with Arduino IDE
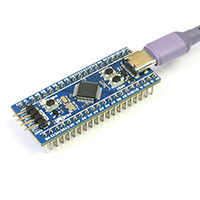
STM32 Blue Pill is a feature-rich development board based on STM32F103C8T6 processor - a 32-bit ARM Cortex M3 processor running at 72MHz frequency. Unlike the common Arduino board which is easy to use, programming the STM32 Blue Pill can be confusing especially for a new user.
There are several ways to program the STM32 Blue Pill with Arduino IDE - some require external hardware, others just need an USB cable. In the following guide, we will cover three common methods of downloading the sketch in Arduino IDE:
So roll up our sleeves and get started.
Download and install Arduino IDE
The first thing you need to do is to download and install the Arduino IDE to your computer. You can get the latest version from the official Arduino website: https://www.arduino.cc/en/Main/Software
Follow the link below to install the Arduino IDE:
Install STM32 Add-on to Arduino IDE
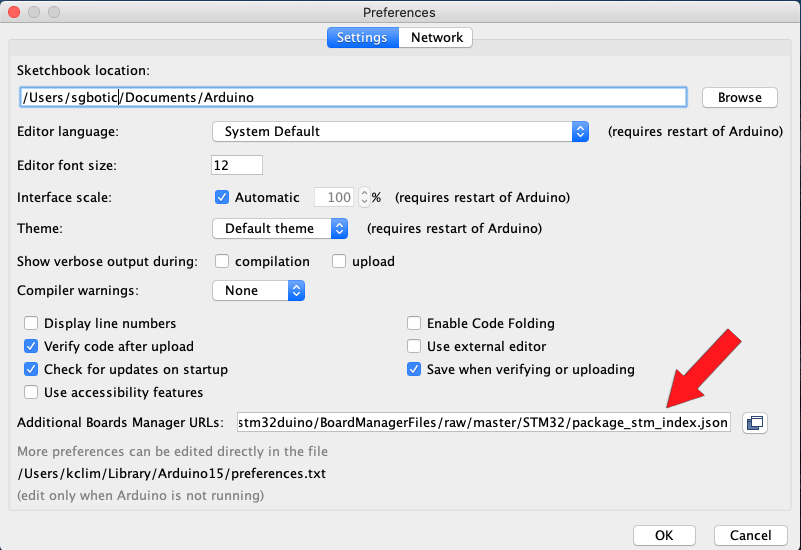
In your Arduino IDE, go to File > Preferences
Add the URL below to Additional Board Manager URLs text box:
https://github.com/stm32duino/BoardManagerFiles/raw/master/STM32/package_stm_index.json
If the text box is not empty, you can separate the URLs with a comma.
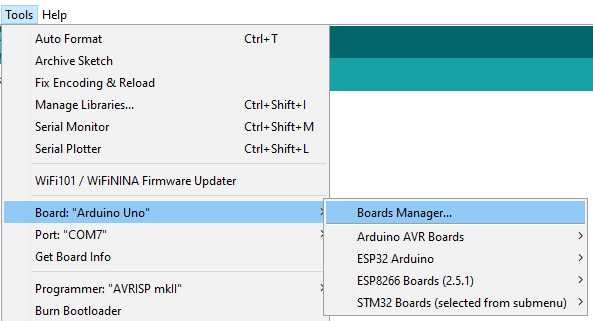
Go to Tools > Board > Boards Manager
Search for STM32, select latest version and click Install.
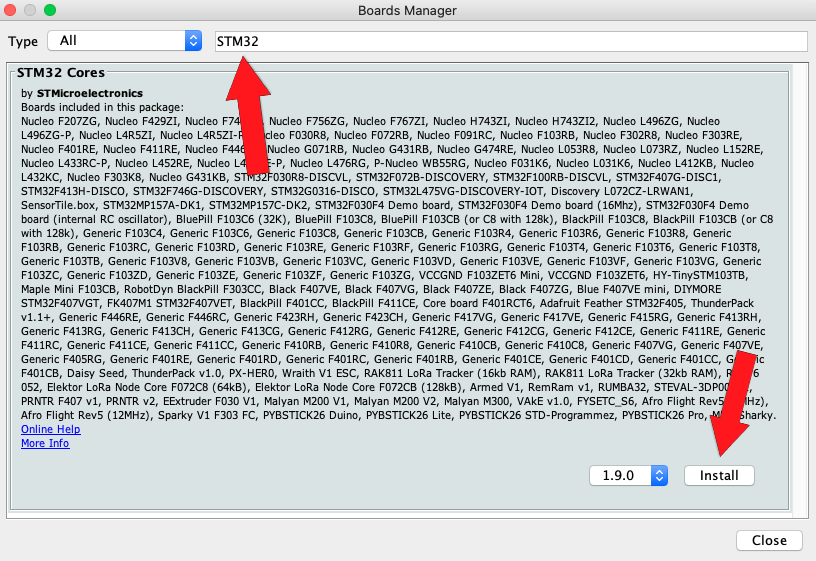
There are a few megabytes of data to download and install, so be patient.
Once the installation is completed, quit and restart the Arduino IDE.
1. Arduino bootloader (Windows & Mac OSX)
The STM32 Blue Pill is pre-flashed with Arduino bootloader which allows you to download the sketch through the Type-C connector.
NOTE: Using JLink / ST-Link dongle or USB to 3.3V TTL adapter to program the board will erase this bootloader.
Setup Arduino IDE
Connect STM32 Blue Pill to your computer USB port.
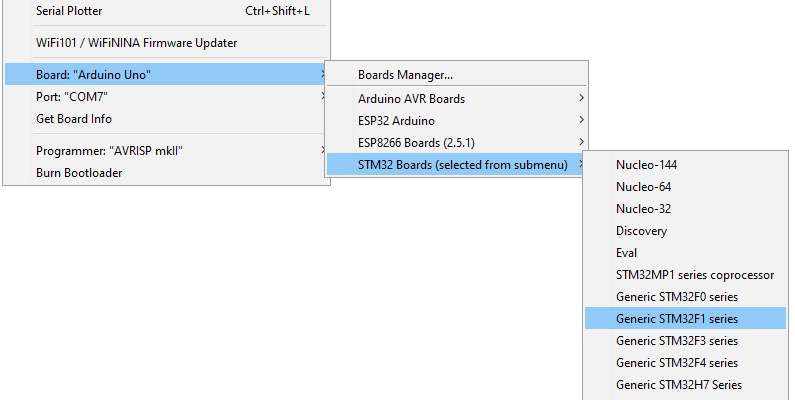
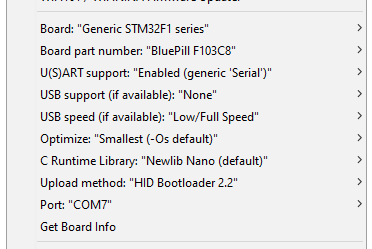
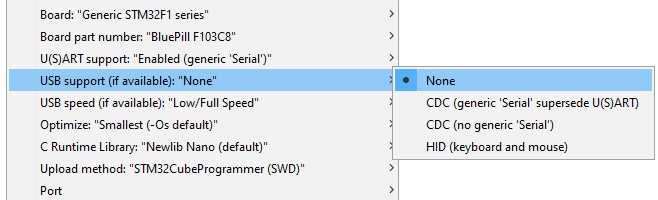
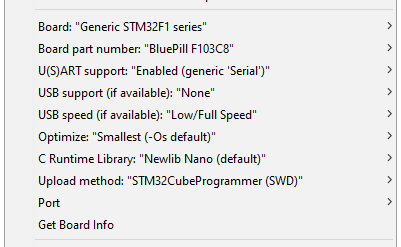
From the Tools > Board > STM32 Board, select Generic STM32F1 series
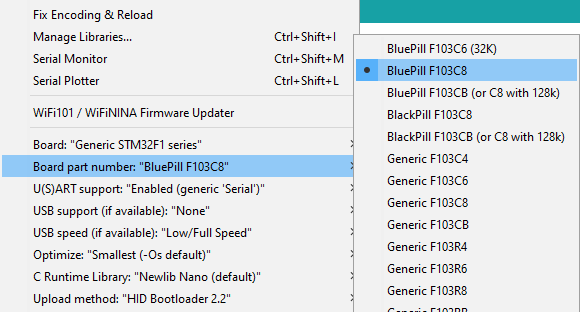
Select Tools > Board Part Number > Blue Pill F103C8
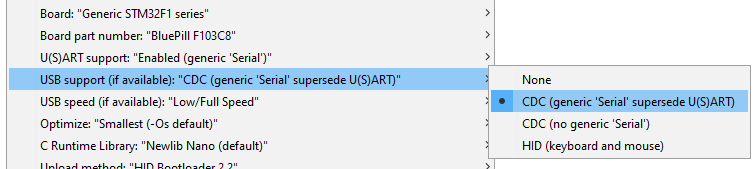
Under
USB Support, select CDC (generic "Serial" supersede U(S)ART)
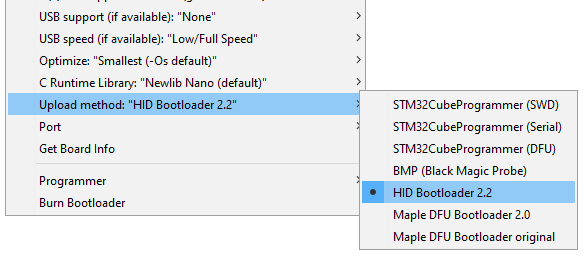
Under
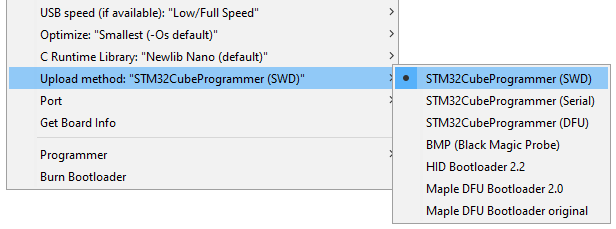
Upload method, select HID Bootloader 2.2
Finally select COM port that is assigned to the STM32 Blue Pill. For Windows, you can check the assigned COM port in Device Manager.
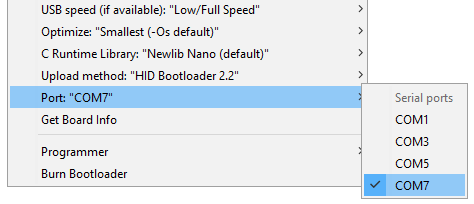
These are your Tool configurations:
Upload sketch
Create new sketch and copy / paste the code below:
/*
  Blink onboard LED at 0.1 second interval
*/
void setup() {
  // initialize digital pin PB2 as an output.
  pinMode(PB2, OUTPUT); // LED connect to pin PB2
}
void loop() {
  digitalWrite(PB2, HIGH);   // turn the LED on (HIGH is the voltage level)
  delay(100);               // wait for 100mS
  digitalWrite(PB2, LOW);    // turn the LED off by making the voltage LOW
  delay(100);               // wait for 100mS
}
Click on the upload button to compile and upload the code to STM32 Blue Pill.
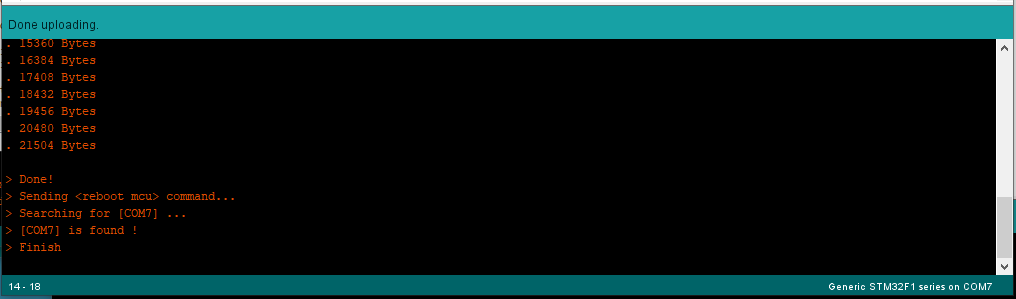
You should see the blue LED blink at 0.1 second interval.
2. STM32 Emulator And Programmer Dongle (Windows only)
NOTE: Using JLink / ST-Link dongle to program the board will erase the Arduino bootloader.
Install STM32CubeProg
Download and install STM32CubeProg from ST.com: https://www.st.com/en/development-tools/stm32cubeprog.html

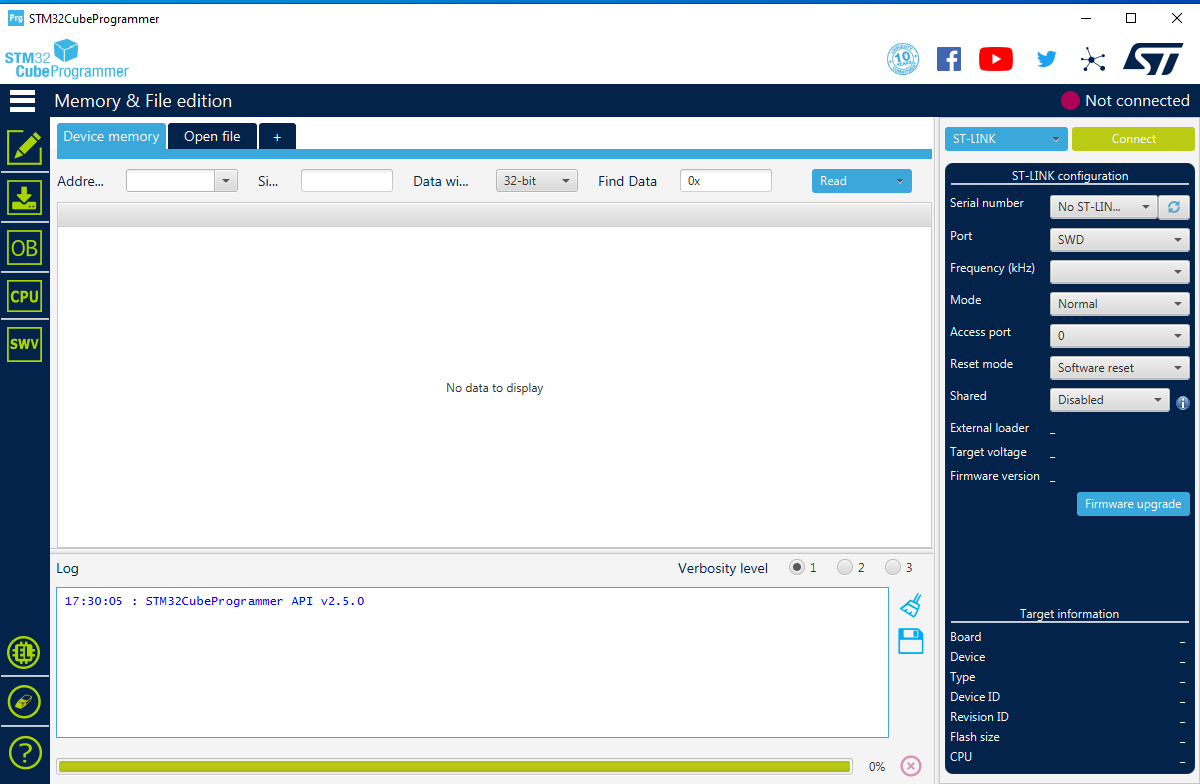
Start the STM32CubeProg. It will look like this:
Close the STM32CubeProg.
Connect STM32 Blue Pill to ST-Link compatible Emulator And Programmer dongle
Follow the wiring diagram below to connect the STM32 Blue Pill to ST-Link compatible Emulator And Programmer dongle.
| STM32 Blue Pill | ST-Link compatible Dongle |
| GND | GND |
| SCK | SWCLK |
| DIO | SWDIO |
| 3V3 | 3.3V |

Connect the dongle to your computer. NOTE: Do not connect STM32 Blue Pill to computer via Type-C USB cable.
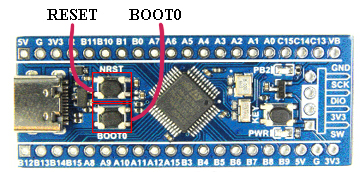
Set the STM32 Blue Pill to bootloader mode using both BOOT0 and NRST button:

- press and hold the BOOT0 button
- press and release NRST (reset) button to power cycle the processor
- release BOOT0 button
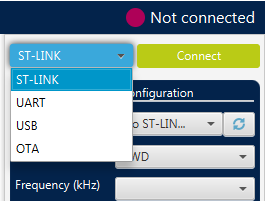
Start the STM32CubeProg. In the top right corner, below the Not Connected message, find the dropdown to the left of the Connect button
Select ST-Link and Click Connect button.
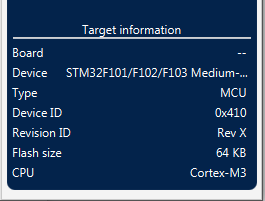
You should see the Target information panel in the bottom right corner.
Now close the STM32CubeProg and start Arduino IDE.
Setup Arduino IDE
Follow instructions above to install the STM32 Add-on to Arduino IDE.
Select Tools > USB Support, select None
Set the Upload method to STM32CubeProgrammer(SWD)
These are your Tool configurations:
Upload sketch
Create a LED blink sketch.
Set the STM32 Blue Pill to bootloader mode using both BOOT0 and NRST button
Click on the upload button to compile and upload the code to STM32 Blue Pill. The uploading speed of using ST_Link dongle is significantly faster than the Arduino bootloader.
Once the sketch is successfully uploaded, the blue LED should blink at 0.1 second interval.
3. USB to 3.3V TTL adapter (Windows only)
NOTE: Using USB to 3.3V TTL adapter to program the board will erase the Arduino bootloader.
Install STM32CubeProg
Follow the instructions above to install STM32CubeProg to your computer.
Wiring
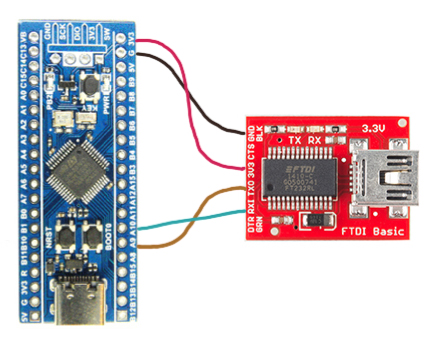
Follow the wiring digram below to connect the STM32 Blue Pill to USB to 3.3V TTL adapter:
| STM32 Blue Pill | USB to 3.3V TTL Adapter |
| 3.3V | 3.3V |
| GND | GND |
| A10 | RX |
| A9 | TX |
Connect the adapter to your computer. NOTE: Do not connect STM32 Blue Pill to computer via Type-C cable.
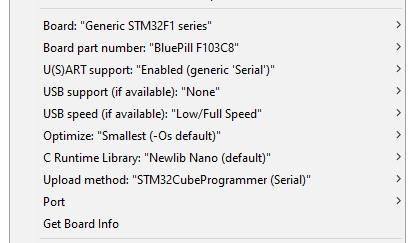
Setup Arduino IDE
Follow instructions above to install the STM32 Add-on to Arduino IDE.
Set the Upload method to STM32CubeProgrammer (Serial)
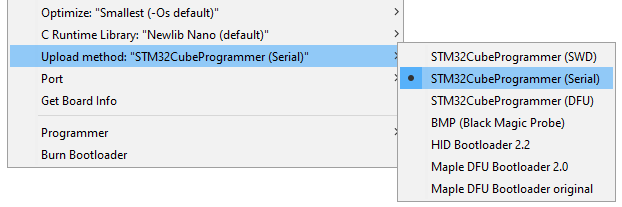
These are your Tool configurations:
Upload sketch
Create a LED blink sketch.
Set the STM32 Blue Pill to bootloader mode using both BOOT0 and NRST button.
Click on the upload button to compile and upload the code to STM32 Blue Pill.
Once the sketch is successfully uploaded, the blue LED should blink at 0.1 second interval.
