


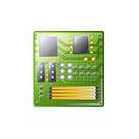


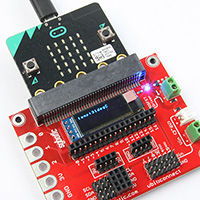
ubit:connect Interfacing Board for BBC micro:bit
Overview
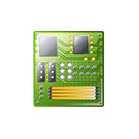
The ubit:connect Interfacing Board is designed to offer an easy way to connect sensors, actuators and other circuits to the micro:bit. The board comes with an 0.91" OLED display to allow developer to display information such as sensor data.

The ubit:connect provides access to all the I/O pins on the bottom edge of the BBC micro:bit. All of the pins have been broken out, allowing access to I/O lines, button A / B, LED matrix, SPI and I2C bus. Separate pin headers are provided for I2C bus at the bottom of the board for easy identification and connection. For those who prefer to use crocodile clips, five ring connectors are provided at the edge of the board.

Both female sockets and male headers are provided for I/O strip, 3V supply, ground and I2C bus to provide better compatibility to male/female jumper wires.

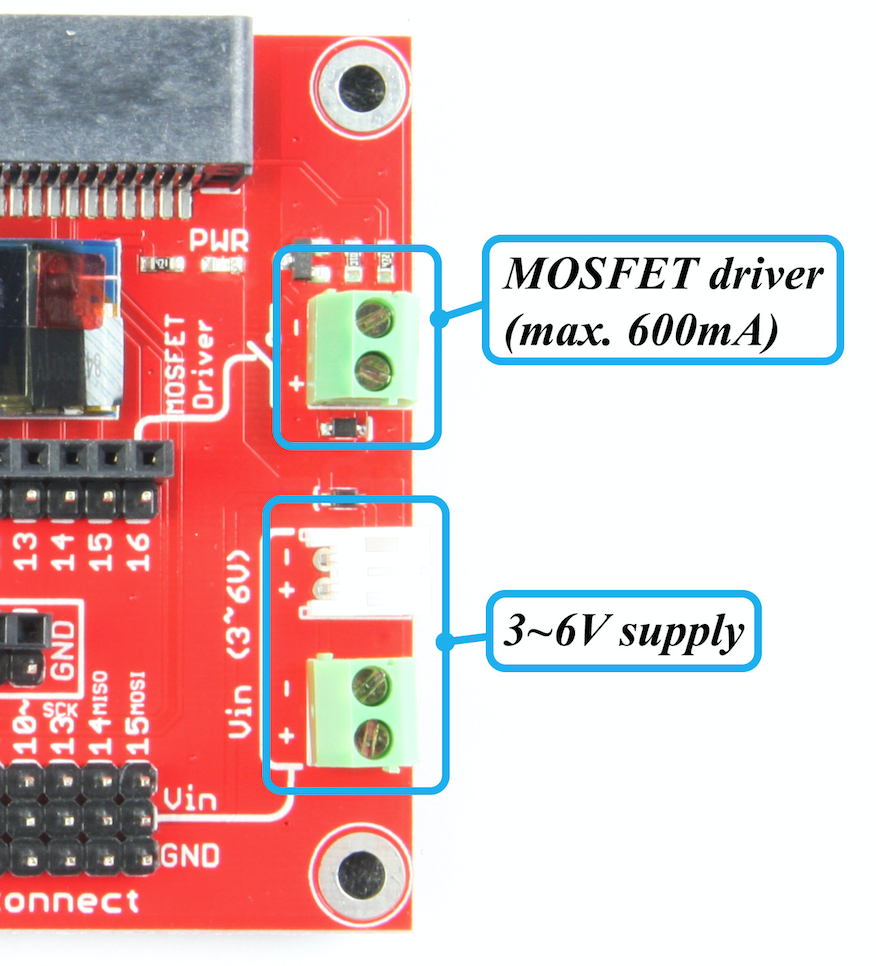
MOSFET driver for DC load
The built-in MOSFET driver can drive DC load up to 600mA. It can be used to drive LED strip, water pump, motor, etc. The driver takes power directly from Vin and is linked to pin 16.
Power up the ubit:connect
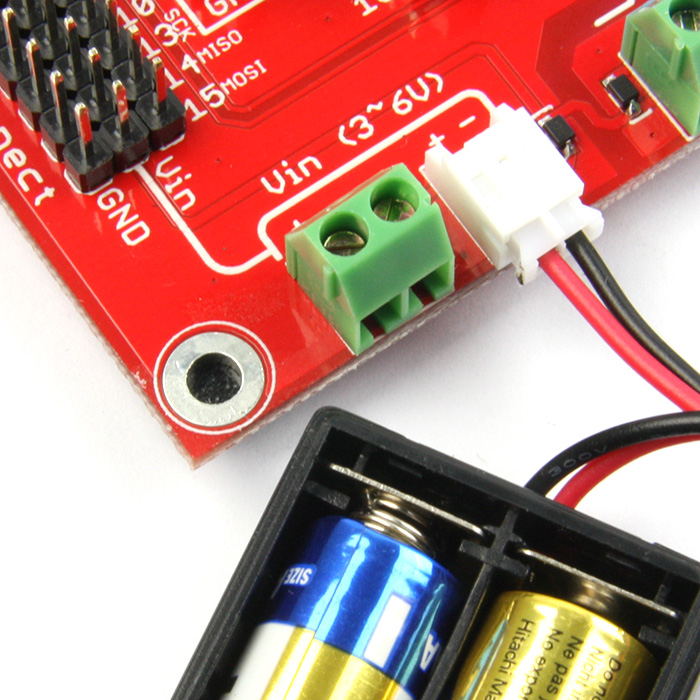
The ubit:connect has two connectors for external power: the JST connector and screw terminal block. The built-in voltage regulator takes input from 3~6V and step down to 3V to power the micro:bit. You can power the ubit:connect with battery pack while the micro:bit is connected to USB.
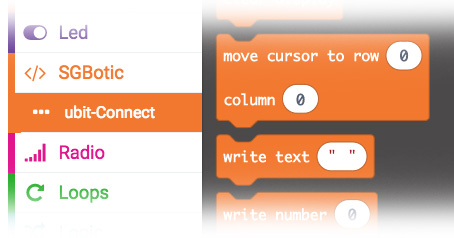
Install ubit:connect Extension
Before we start to create the program, we need to install the MakeCode extension for the ubit:connect. In MakeCode editor, go to "Advance" -> "Extensions", enter the link below in the search bar and click on search button:
| https://github.com/SGBotic/pxt-SGBotic-connect |
Proceed to click on the "SGBotic-connect" to compete the installation. A "ubit-Connect" package under "SGBotic will appear in your block menu:
Mini Project: Display Temperature On OLED Display
In this project, we will walk you through the steps to monitor the temperature of the micro:bit using the built-in temperature sensor in the micro:bit.
Hardware Hookup
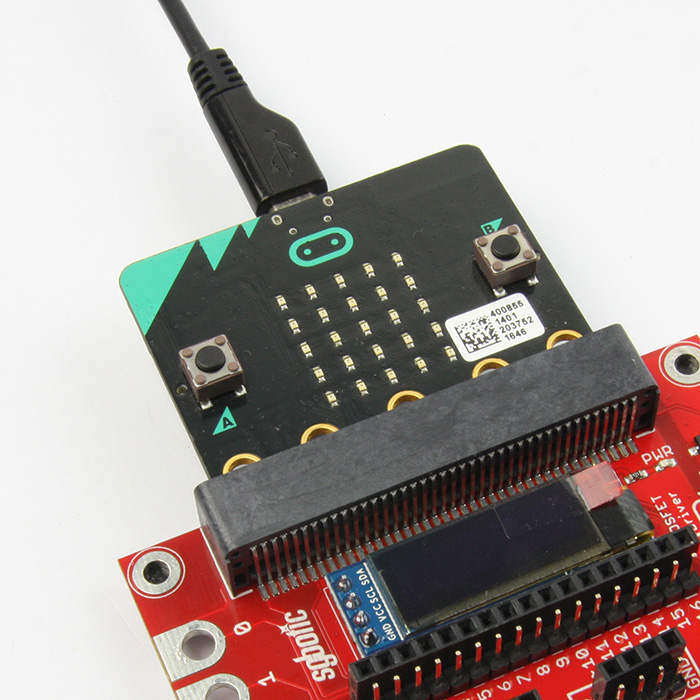
First, insert the micro:bit into the ubit:connect's edge connector. The LED matrix and two push buttons on the micro:bit should face up. Connect the micro:bit to your PC.
Example Code
In the MakeCode editor, install the ubit:connect extension and create the program below:

Proceed to upload the program to micro:bit.
Once uploaded, the OLED display will show the temperature:

Mini Project: Driving DC Fan
in this project, we will use the built-in MOSFET driver to drive a DC fan. You can control the fan speed with the two push buttons on the micro:bit:
- Button A: increase speed
- Button B: decrease speed
- Button A+B: stop the fan
Note: the driver is designed to drive the motor in one direction only.
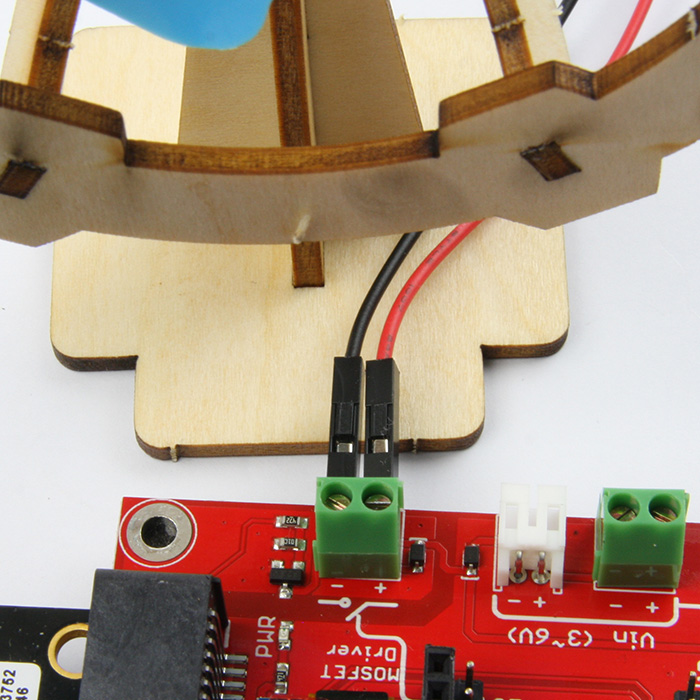
Hardware Hookup
Connect DC motor to ubit:connect.
Hook up the battery pack
Example Code
Create the program below in MakeCode editor:
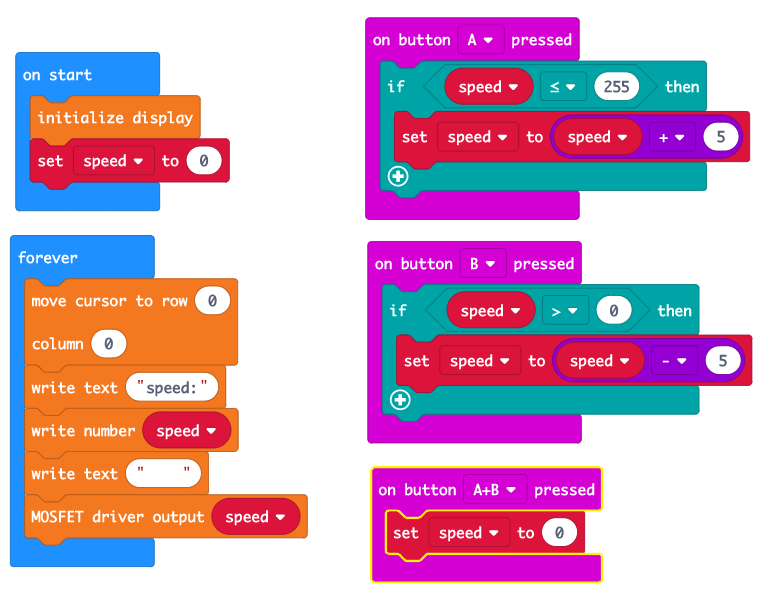
Once uploaded, use 'A' button to increase the speed and 'B' button to decrease. The speed range from 0 to 255 and will appear on the OLED diplay.
To stop the fan, press 'A' and 'B' button together.
Mini Project: Servo Motor
ubit:connect comes with pin headers for the servo motor. In this project, we will walk you through the steps in controlling a 9g servo motor using the 'A' and 'B' push button:
- 'A' Button: increase angle
- 'B' Button: decrease angle
Hardware Hookup
Connect servo motor to pin 15. Supply to the servo motor will be tapped directly from the battery pack.

The servo motor used in this project operates at 4.8V to 6V. So hook up a 4-cells battery pack (6V) to the ubit:connect.

Example Code
Create the program below in MakeCode editor:

Once uploaded, use 'A' and 'B' buttons to change the servo angle. The lower limit is set to 30 to prevent the servo motor from jitter.
